How to Paint Realistic Fur on Miniatures (Step-by-Step Guide)
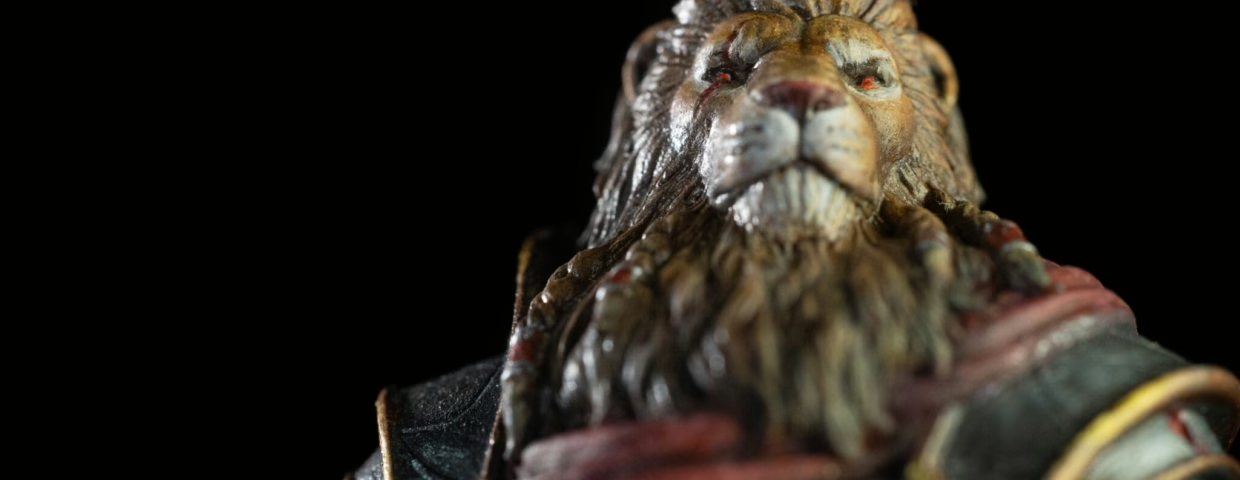
You’ve spent hours layering smooth skin tones, crisp armor plates, and detailed leather strapping on a miniature. Then you reach the wolf pelt, the manticore mane, or the bear cloak. You apply a basic brown or gray basecoat, flood the texture with a heavy black wash, drag a chalky white drybrush across the surface, and instantly flatten the sculpt. The fur looks dusty, dry, and disconnected from the rest of the model.
This is where many paint jobs stall. Fur is an incredibly common texture across tabletop RPG miniatures, wargaming armies, and display pieces, yet it remains notoriously difficult to render convincingly.
The breakdown rarely happens because your hands aren’t steady enough, or because you lack a triple-zero brush. It happens because of how you perceive the material. Believable fur does not require painting every single strand of hair. It requires an understanding of volume, contrast, paint consistency, and color temperature. Once you stop painting individual hairs and start painting light over a textured form, the process becomes entirely manageable.
Look at What You’ll Be Painting
The number of colors to start with depends on how varied you wish the final look to be. Much like wood, fur often looks streaked with other colors, giving an overall flowing texture. The difference lies in the direction it flows. Fur, especially medium-length, curves and usually adopts the shape of the surface it covers.
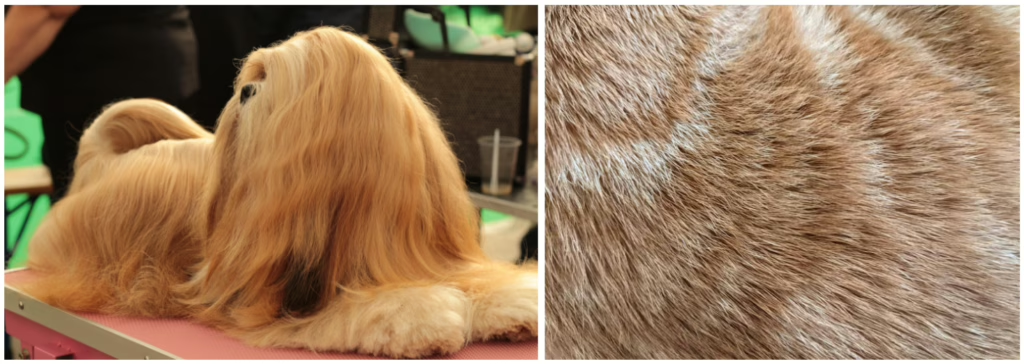
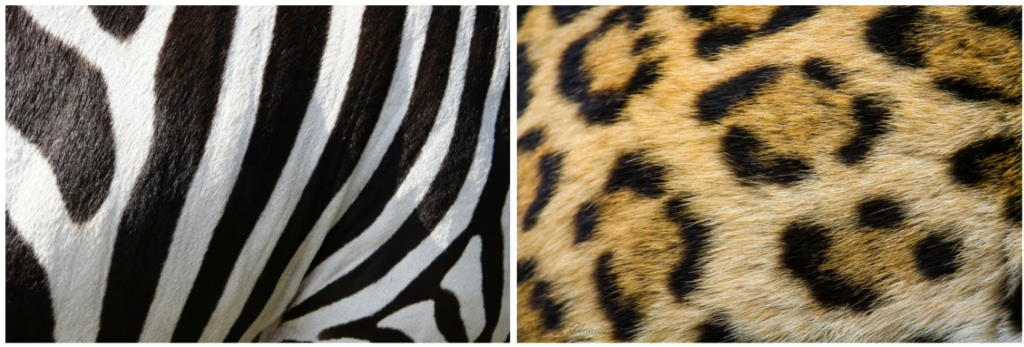
Short fur has an outward direction while giving a subtle hint of the volume underneath through the way it flows. Longer fur flows mostly downwards. They can be wavy or straight (just like matte or glossy). In some animals, like a panther, there’ll be clear highlights on its slick surface. Others, such as zebras and jaguars, have patterns.
Why Fur Often Looks Wrong on Miniatures
Most failed attempts at painting miniature fur stem from four specific errors in judgment and execution.
Over-Highlighting and the Loss of Form
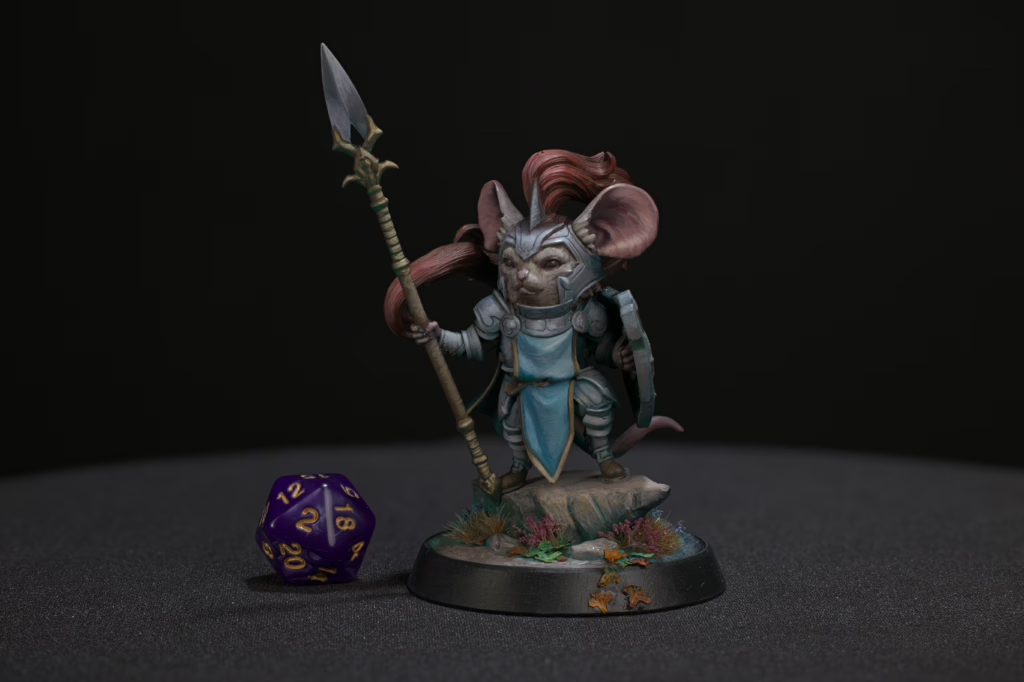
The most common mistake is treating every sculpted tuft of fur equally. When you apply the exact same bright highlight to every raised bump from the top of a monster’s neck down to its underbelly, you destroy the illusion of three-dimensional volume. The miniature loses its lighting map and turns into a visually noisy, flat pattern.
Monochromatic Color Schemes
Real animal coats are never just one flat color mixed with white or black. A timber wolf isn’t just “neutral gray,” and a lion isn’t just “flat yellow-brown.” When you use a single bottle of paint and simply add white for highlights, the fur becomes desaturated and chalky. Natural fur contains shifting fields of warm and cool tones.
Wash Flooding
Drenching textured fur with a heavy, watery wash from the bottle is a quick way to lose control of your contrast. Watery washes pool unpredictably on flat areas of the sculpt, creating messy coffee-ring stains as they dry, and can inadvertently turn your brightest highlights dark if the paint flows where it shouldn’t.
Drybrush Abuse
While drybrushing is a valuable texturing tool, using it as a shortcut for your entire lighting solution ruins depth. An uncontrolled drybrush catches random edges, desaturates your colors, and deposits a dusty, chalky grain across the model, breaking the organic, supple look of real hair.
How Light Behaves on Fur
Unlike flat metal or smooth skin, fur is a disruptive surface composed of thousands of overlapping fibers. This creates a specific interplay of light and shadow.
- Shadow Trapping: Because hair structures create micro-shadows everywhere, fur naturally traps a lot of shadow because of all the overlapping hairs. This means your shadow areas must be deep, solid, and deliberate to ground the creature.
- Highlight Concentration: True highlights on fur do not scatter across the entire surface. They concentrate heavily on the crests of the muscle groups directly facing your light source.
- The Danger of Timid Contrast: If your highlights are too dark or your recesses are too bright, the fur turns into a muddy, unreadable gray or brown blob. You need clean, deep shadows sitting immediately alongside progressive, bright highlights to create visual readability at a 32mm or 75mm scale.
Step-by-Step Fur Painting Workflow
This six-step workflow, balancing layered volumes with crisp texture passes, is ideal for display models and character miniatures alike.
1st Step: Zenithal Prime
Start by coating the entire model in a solid, matte black primer. Once dry, apply a crisp white primer strictly from a 45-degree angle directly above the miniature. This establishes your light map. The white primer shows you exactly where the broad highlights must live and where the absolute shadows must be preserved.
2nd Step: Dark Basecoat
Apply a deep, rich base color across the entire fur mass. For a natural brown coat, use a mix of dark chocolate brown and a deep violet. Keep the paint flowing smoothly but thin enough that it doesn’t clog the sculpted lines. Ensure this layer penetrates the deep recesses, establishing a heavy foundation of shadow.
3rd Step: Broad Midtone Highlights
Ignore individual hairs. Using a warm midtone brown, glaze over the large raised muscle groups and volumes highlighted by your zenithal undercoat. Use the side of your brush to map out these fields of light, leaving the deep depressions and undersides completely in your basecoat color.
4th Step: Texture Passes and Area Reduction
This step introduces the illusion of hair texture while enforcing area reduction. Choose a lighter tone, such as a sandy brown or a dark ivory-brown mix. Ensure your brush is perfectly wicked and damp.
Pull your brush strokes strictly in the direction of the fur growth, using short, overlapping, directional flicks. Curve your strokes gently around the creature’s underlying anatomy.
Crucially, each highlight layer should cover a smaller area than the previous one. Focus your strokes only on the upper two-thirds of each raised volume. By reducing the placement area with every progressive layer, you naturally build three-dimensional depth and avoid a flat, chalky finish.

5th Step: Color Variation and Glazing
To bind your texture passes together and inject life, apply a highly translucent glaze. Using a rich chestnut or sepia ink thinned heavily with acrylic medium, brush over the transition zones between your highlights and shadows. This tinting step creates an organic color modulation that mimics the varied under-fur of real beasts.
6th Step: Final Definition
Mix a bright, highly saturated tone like pure ivory or soft cream. With an incredibly sharp brush tip and minimal paint load, apply tiny, selective directional highlights exclusively to the highest tips of the fur masses closest to the sky. Keep this step highly restrained; over-highlighting at this stage will ruin your contrast map.
Seeing the Masterclass in Action
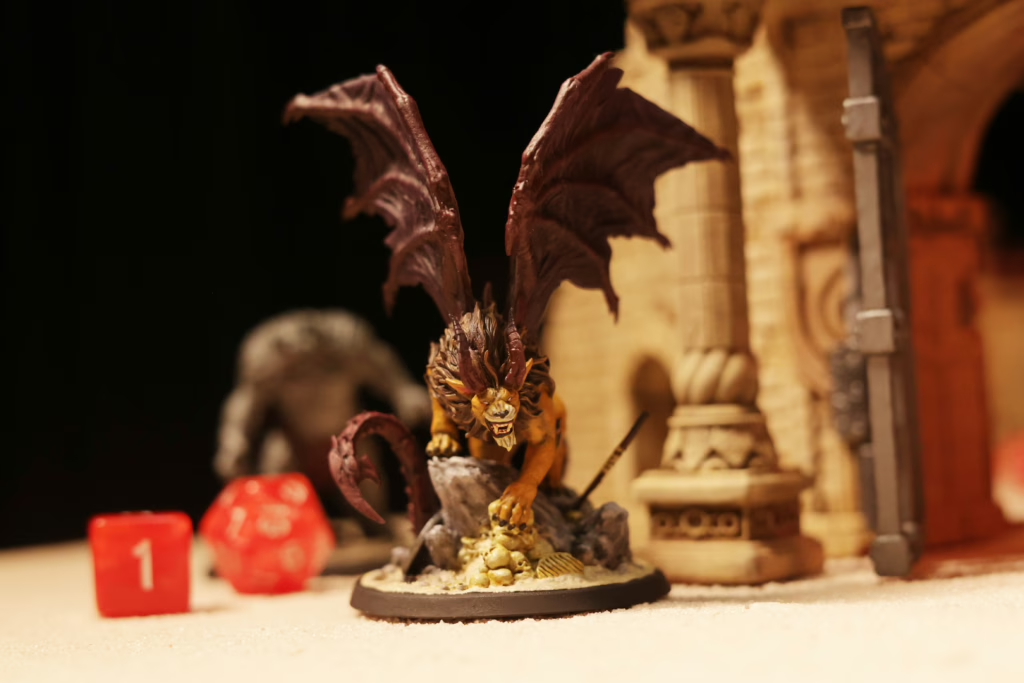
If you want a visual breakdown of how this volume-first approach works on an actual production model, our studio team put together an exceptional masterclass video. In this tutorial, you’ll see Márcia, our Lead Painter, tackle the massive fur mane of a Manticore.
Notice how she uses an initial zenithal map, leaves the deep recesses completely dark, and uses thin glazes of rich inks to layer the shifting color temperatures across the creature’s back.
Fast Fur Painting with Drybrush and Sponge Techniques
When you need to paint a horde of twenty dire wolves or a massive table-ready terrain piece in one evening, a manual layering process can be too slow. You can achieve high-contrast, convincing results quickly by combining a deliberate, directional drybrush with a simple kitchen sponge.
The Shadow Reset: To prevent your fast highlights from looking flat, take a dark brown or dark blue wash and manually paint it directly into the deep leg creases, underbellies, and recesses. This anchors your quick texture back onto a strong volume map.
The Directional Drybrush: Apply your dark basecoat over the entire miniature. Once dry, load a stiff, flat-headed drybrush with your midtone color. Wipe almost 95% of the paint off onto a paper towel until it leaves only a faint whisper of pigment on your skin. Drag the brush strictly down and across the natural flow of the fur sculpt. Never scrub the brush back and forth randomly; moving in one deliberate direction keeps your highlights clean and prevents a dusty, chaotic texture. Drybrushing is a texture tool, not a full lighting solution; it catches raised edges but requires manually painted shadows underneath to retain depth.
Sponge Modulation: Tear off a tiny, jagged corner of packing foam or a kitchen sponge. Hold it with tweezers, dip it lightly into a warm cream or yellow-ochre tone, and dab the excess away on a cloth. Lightly stipple the sponge along the upper spine, shoulders, and mane of the creature. This irregular, broken texture perfectly breaks up the uniform lines left by the drybrush, mimicking natural animal pelts.
Common Fur Painting Mistakes
Recognizing where a texture pass went wrong is the first step toward correcting it.
1st Error: The “Static Shock” Look (Highlighting Every Tuft)
- Why it happens: You treated the fur as texturing lines rather than an underlying geometric shape, drybrushing or layering across the entire model uniformly.
- The Fix: Mix a dark ink with an acrylic medium to create a clean glaze. Manually paint this glaze back into the shadows and midtone valleys on the lower half of the muscle forms, restoring your global lighting map.
2nd Error: Chalky, Dusty Finish
- Why it happens: You used pure white to highlight a warm brown or red coat, or you used a drybrush that was too dry and held loose, powdery pigment particles.
- The Fix: Glaze over the chalky areas with a warm satin varnish or a heavily thinned transparent ink (like sepia or hazelnut). This binds the loose pigment particles together, eliminates the dusty look, and re-saturates the color.
3rd Error: Lost Texture due to Flooded Washes
- Why it happens: Your wash was too watery and loaded heavily onto the brush, causing it to pool over the entire sculpt and erase your base values.
- The Fix: Let it dry completely. Re-establish your midtones using the side of your brush, skipping the recesses entirely, and use stricter area reduction on your subsequent texture passes.
4th Error: Errant Fur Direction
- Why it happens: You pulled your brush strokes across the sculpted hair flow, creating unnatural horizontal lines that fight the anatomy of the animal.
- The Fix: Basecoat that specific patch again. Re-apply your highlights by ensuring your hand always pulls the brush with the grain of the sculpt, curving the strokes naturally around the underlying joints.
Final Tips for More Natural Fur
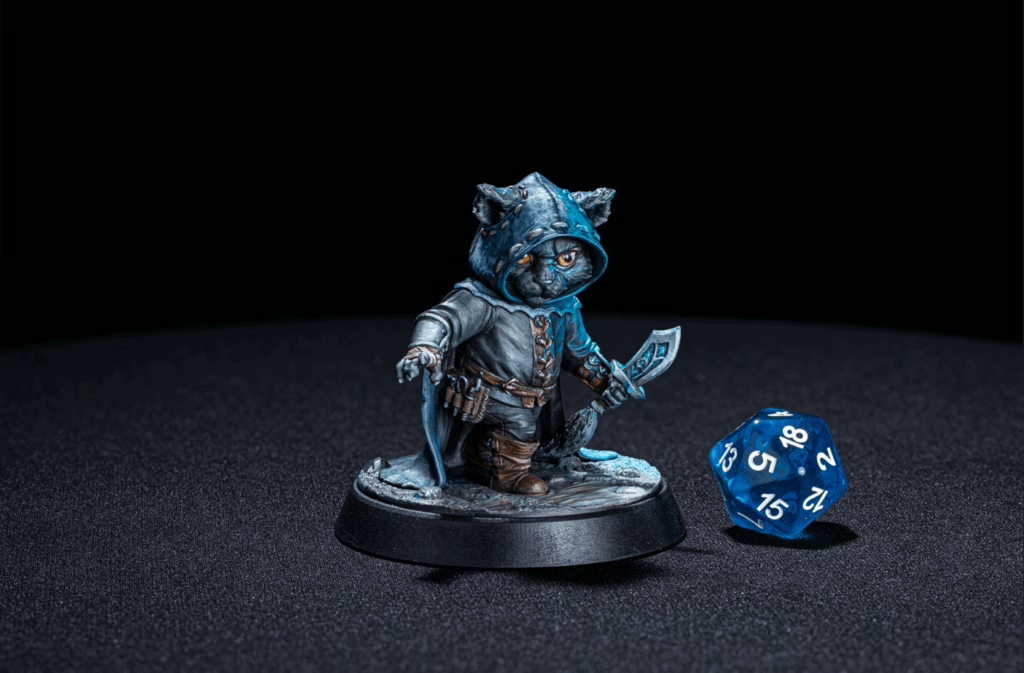
Painting convincing fur textures becomes incredibly straightforward once you shift your mindset away from rendering individual hairs and focus on painting light moving across a textured form. Control your macro-lighting first, use strict area reduction with your subsequent texture layers, and keep your brush tip damp and controlled.
At Loot Studios, we engineer and test our files across multiple machines to ensure that the sculpted details are deep enough to catch your paint naturally, whether you are using traditional display glazes or fast, table-ready drybrushing methods.
If you want to practice your texturing passes and color modulation on high-quality sculpts right now, you can download our Free Mini Pack. It includes highly detailed, pre-supported models designed specifically to help you master texture rendering and elevate your paint jobs from the workbench to the tabletop. Load your palette, check your brush moisture, and enjoy the process. Happy painting, Looters!
Loot Studios can help you tell your story through highly detailed minis, statues, terrains, busts, and props. Sign up for Loot and choose your favorite bundles from our library of more than 130 options. You can also learn more about our printing and painting process by checking our YouTube Channel.

Robert, also known as Rob, is an artist, English teacher, and lifelong RPG enthusiast. When he’s not sketching worlds or guiding learners through language, he’s diving into dice-rolling adventures and uncovering the magic that makes tabletop storytelling unforgettable. Fuelled by imagination and curiosity, Rob has spent years immersed in the RPG community, studying its stories, creatures, and creativity. He currently works in the marketing department at Loot Studios, where his passion for fantasy, minis, and the RPG universe fuels everything he does. Always with one foot in the real world and one in the realms of adventure, Rob celebrates art, language, and the joy of bringing ideas to life, whether at the table, in class, or behind the scenes.