How to Scale Up Your Miniatures
Get Your Fingers Off the “Ctrl” and “+” Keys. Now.

So, you want to print big.
You have an amazing 75mm model, but you have a vision: you want it to be a 150mm statue. Your first instinct is to just drag the “scale” slider in your slicer to 200%. It’s tempting.
But wait. How is it possible to scale a miniature up and save some resin at the same time? You’ve just run head-first into a little problem our old friend geometry likes to call the “Square-Cube Law.”
Don’t worry. We’ve wrestled with this exact problem ourselves—all the way up to printing a 4,500% scale-up of our “Newton” mascot, which now stands 1.6 meters (5’2″) tall in our headquarters!
We’ll show you how to do it. Here are three ways to scale your minis, ranging from the “easy” approach to the “expert” method.
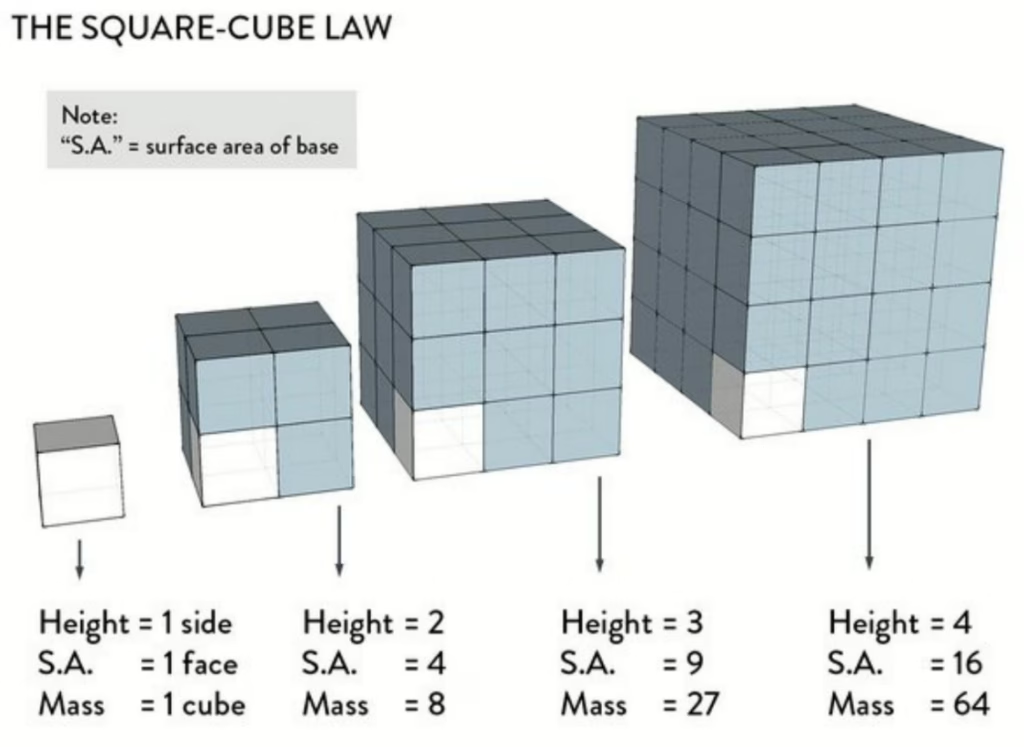
The Problem: The “Square-Cube Law” (Why You Can’t Just Scale It)
That scary-sounding law is simple. If you take a 3D object and double its height (a 2x linear scale), you’re not just doubling the resin.
You’re quadrupling its surface area (2×2).
You’re octupling its volume (2x2x2).
That means your 200% scale-up will cost 8 times the resin, not 2. Worse, if you scale a pre-hollowed file, the wall thickness also scales. That 2mm wall becomes a 4mm wall, wasting a ton of resin and making post-processing a nightmare.
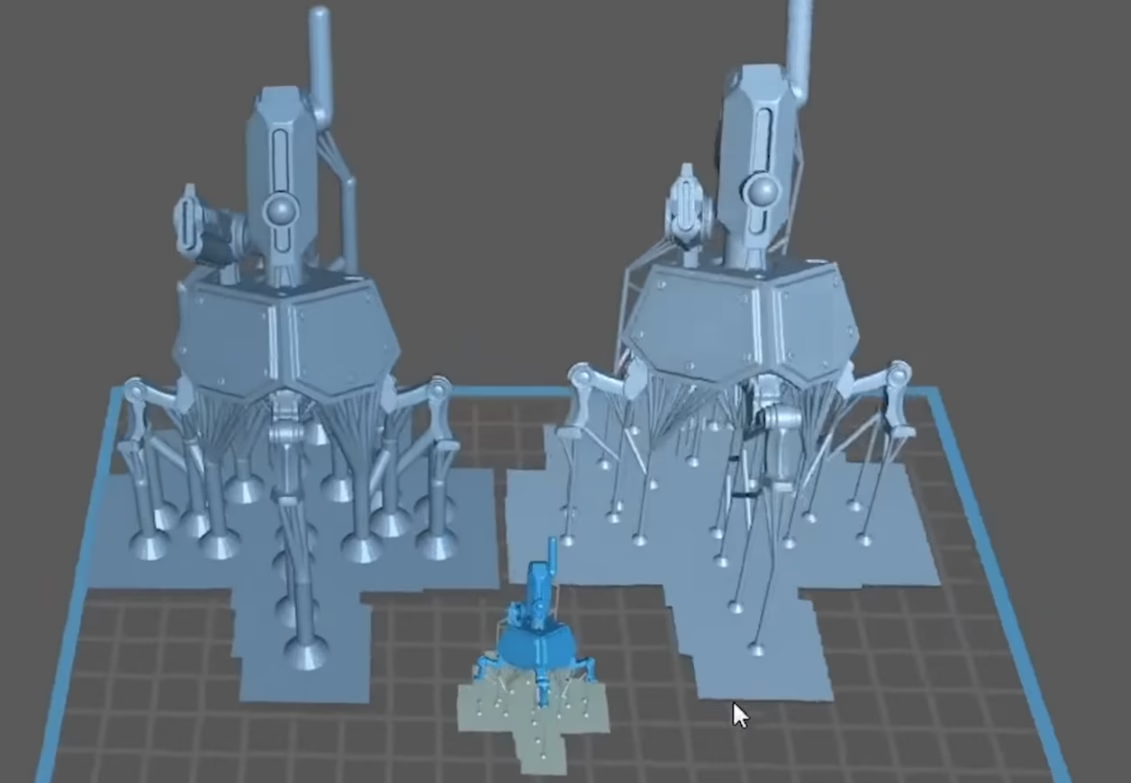
The Test: 3 Methods, 1 Model
Let’s test this in the real world. We’ll take this “Helper” robot from our Sci-Fi Welcome Pack and scale it up 300%.
Original 75mm (Solid): 2.3 grams of resin.
300% Scale (Solid): 63 grams of resin.
That’s a huge jump! Now let’s see how our three methods compare at saving resin.
Method 1: The “Easy” Way (Scale the Pre-Supported, Hollow File)
This is the first option and the one most people try. You just take the 75mm pre-hollowed file and scale it to 300%.
Resin Used: 59 grams.
Result: It’s a terrible idea. You only saved 4 grams. Why? Because the hollow wall also scaled up, from 2mm to 6mm! The supports and raft are now rigid, thick, and will leave huge marks on your print. Never do this.

Method 2: The “Good” Way (Scale Solid, Then Hollow)
This is the best option for most home users. You start with the solid, unsupported version of the model.
Scale It: Scale the solid model to 300% in your slicer.
Hollow It: After scaling, use your slicer’s hollow function to set the wall thickness back to our 2mm standard.
Add Holes: Add 3mm (or larger) drain holes near the build plate to let the resin out and reduce suction.
Add Supports: Add new supports (or use auto-supports) inside the hollowed part.
- Resin Used: 40 grams.
- Result: A “considerable saving.” By simply hollowing after scaling, we’ve already saved 19g (32%) over Method 1. For a small adjustment, that’s a huge win.
Method 3: The “Loot” Way (The Expert Method)
This is the most complex option, but it’s how we get maximum savings. This requires more advanced work in your slicer (like Lychee), but the results speak for themselves.
Open the Solid File: Start with the solid, 75mm model.
Manually Reduce Supports: Here’s the trick. We know we’re scaling up 300%. So, we’ll select all the supports and divide their thickness by 3. A 1mm support becomes a 0.33mm support. This is complex, as you may need to add a few extra supports to keep it from failing.
Scale It: Now, scale the entire file (model + tiny supports) up by 300%. Your 0.33mm supports will scale back up to a perfect 1mm.
Hollow It: Hollow the 300% model to 2mm, just like in Method 2.
Add Holes: Add your 3mm drain holes.
- Resin Used: 23 grams.
- Result: This is the clear winner. By taking 20 minutes to modify the supports, we went from the “Easy” 59g to 23g. That’s a 61% resin savings!
Does This Work on BIG Models? (The 500% Test)
Yes! We did this with a chest from our Panshaw Under Siege bundle, scaling it 500%.
Method 1 (Estimated): 650 grams of resin.
Method 3 (The “Loot” Way): 180 grams of resin.
That’s 470 grams of resin saved. This single 20-minute modification saved us the cost of half a bottle of resin.

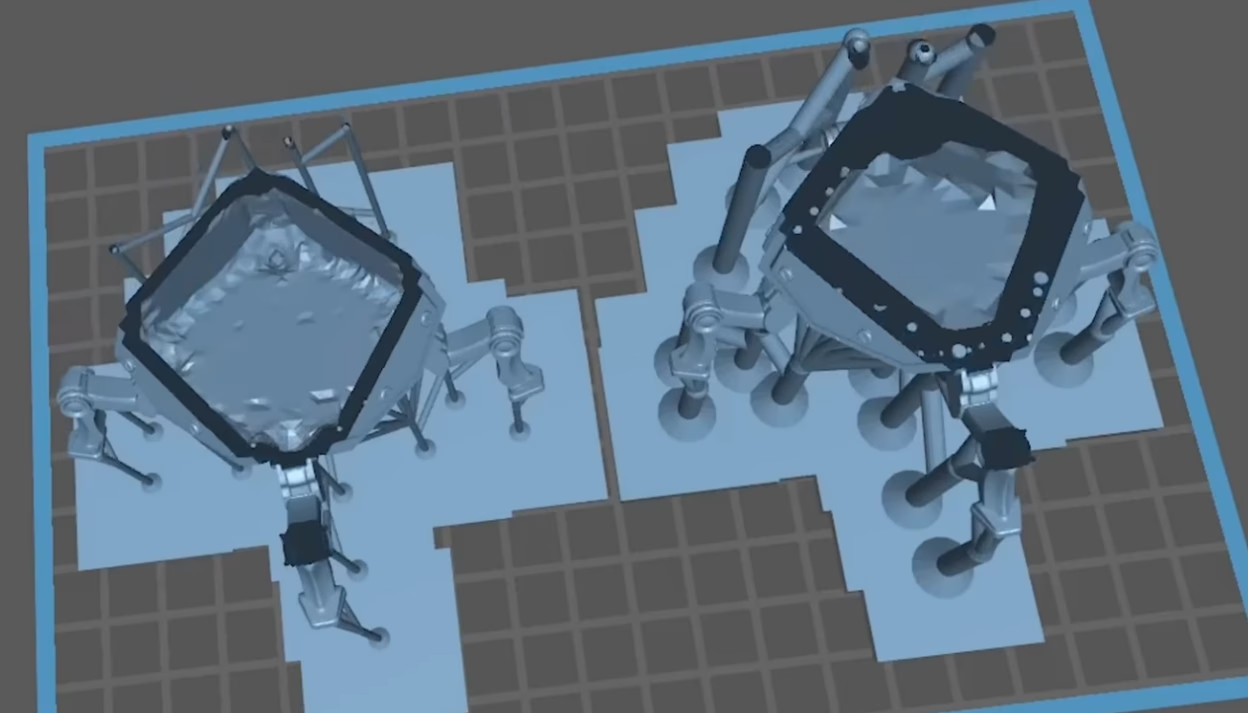
What If It Doesn’t Fit My Printer?
Once you start scaling, you’ll quickly run out of build plate space. The solution is simple: you have to chop your model.
We use ZBrush for our work, but you can do this for free. A program like Windows 3D Builder allows you to load your model and use a simple “split” function to cut it into manageable pieces. You can then print each part separately and assemble them after curing.
Final Thoughts
Scaling miniatures is not a trivial process, but it’s not magic. The key takeaways are:
Never scale a pre-hollowed file. Always scale the solid model first, then hollow it. For max savings, edit your supports before you scale.
You gain the freedom to print any model, at any size, while maximizing your material efficiency. Once you’re done with this, check our guide on post-processing.
WANNA KNOW A LITTLE BIT MORE ABOUT 3D PRINTABLE MINIATURES? CLICK HERE!
Loot Studios can help you tell your story through highly detailed minis, statues, terrains, busts, and props. Sign up for Loot and choose your favorite bundles from our library of more than 130 options. You can also learn more about our printing and painting process by checking our YouTube Channel.